Gosaikunda Trek Guide: Complete Itinerary, Cost & Real Difficulty
Table of Contents
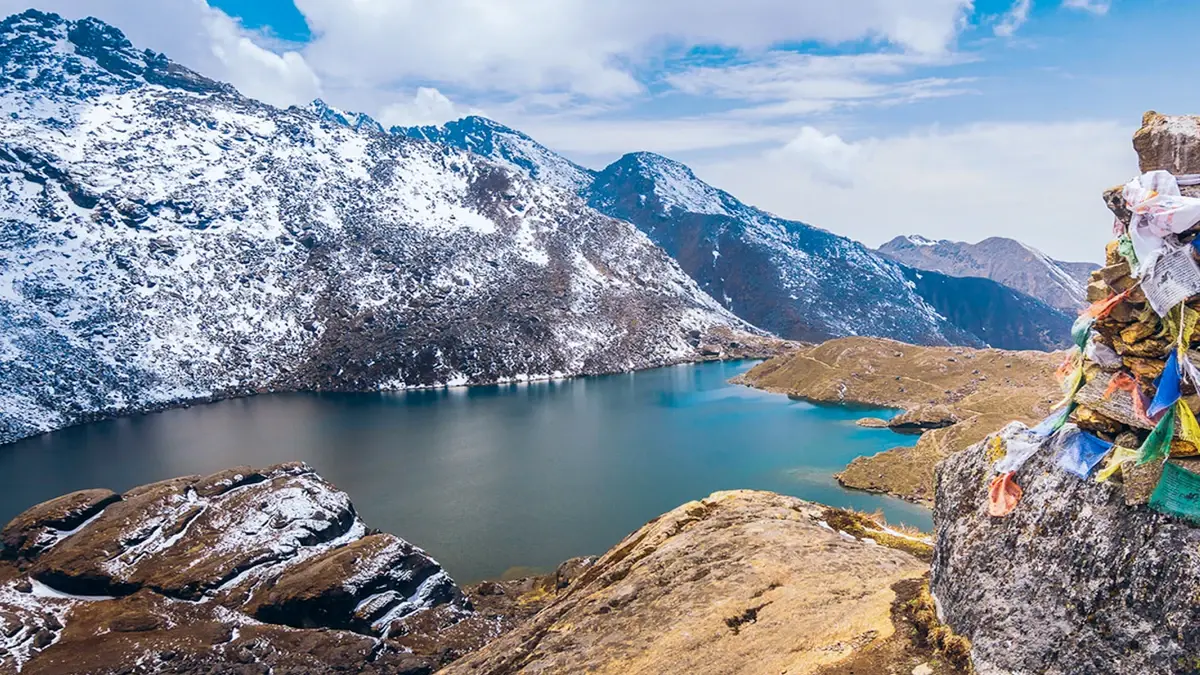
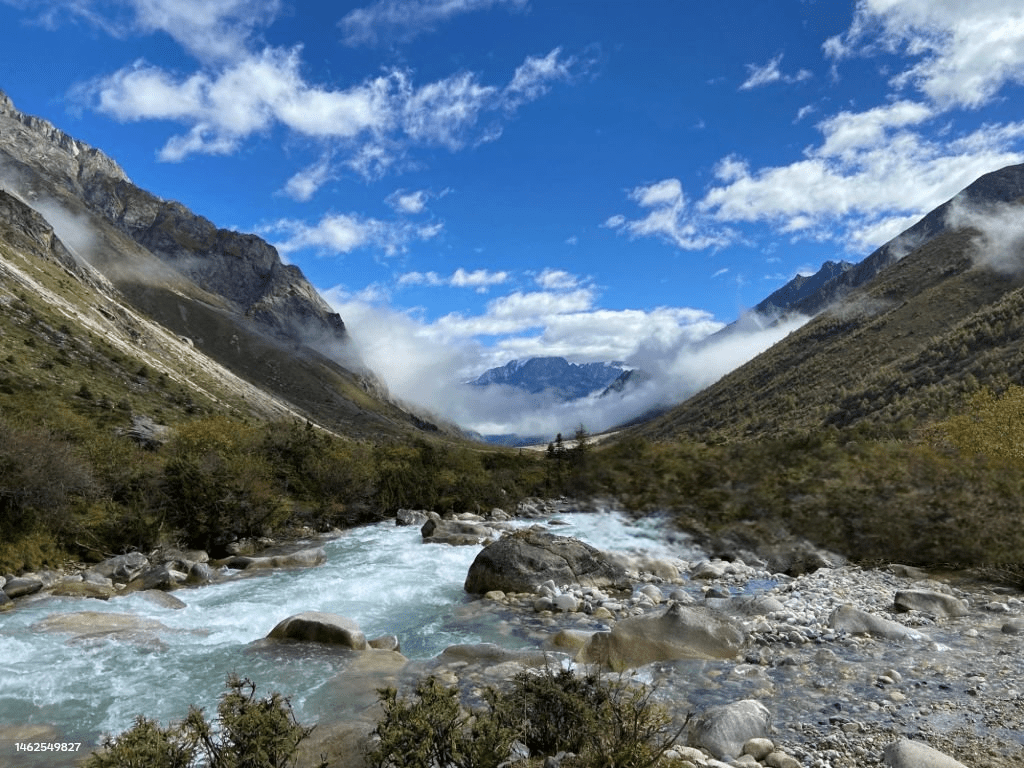
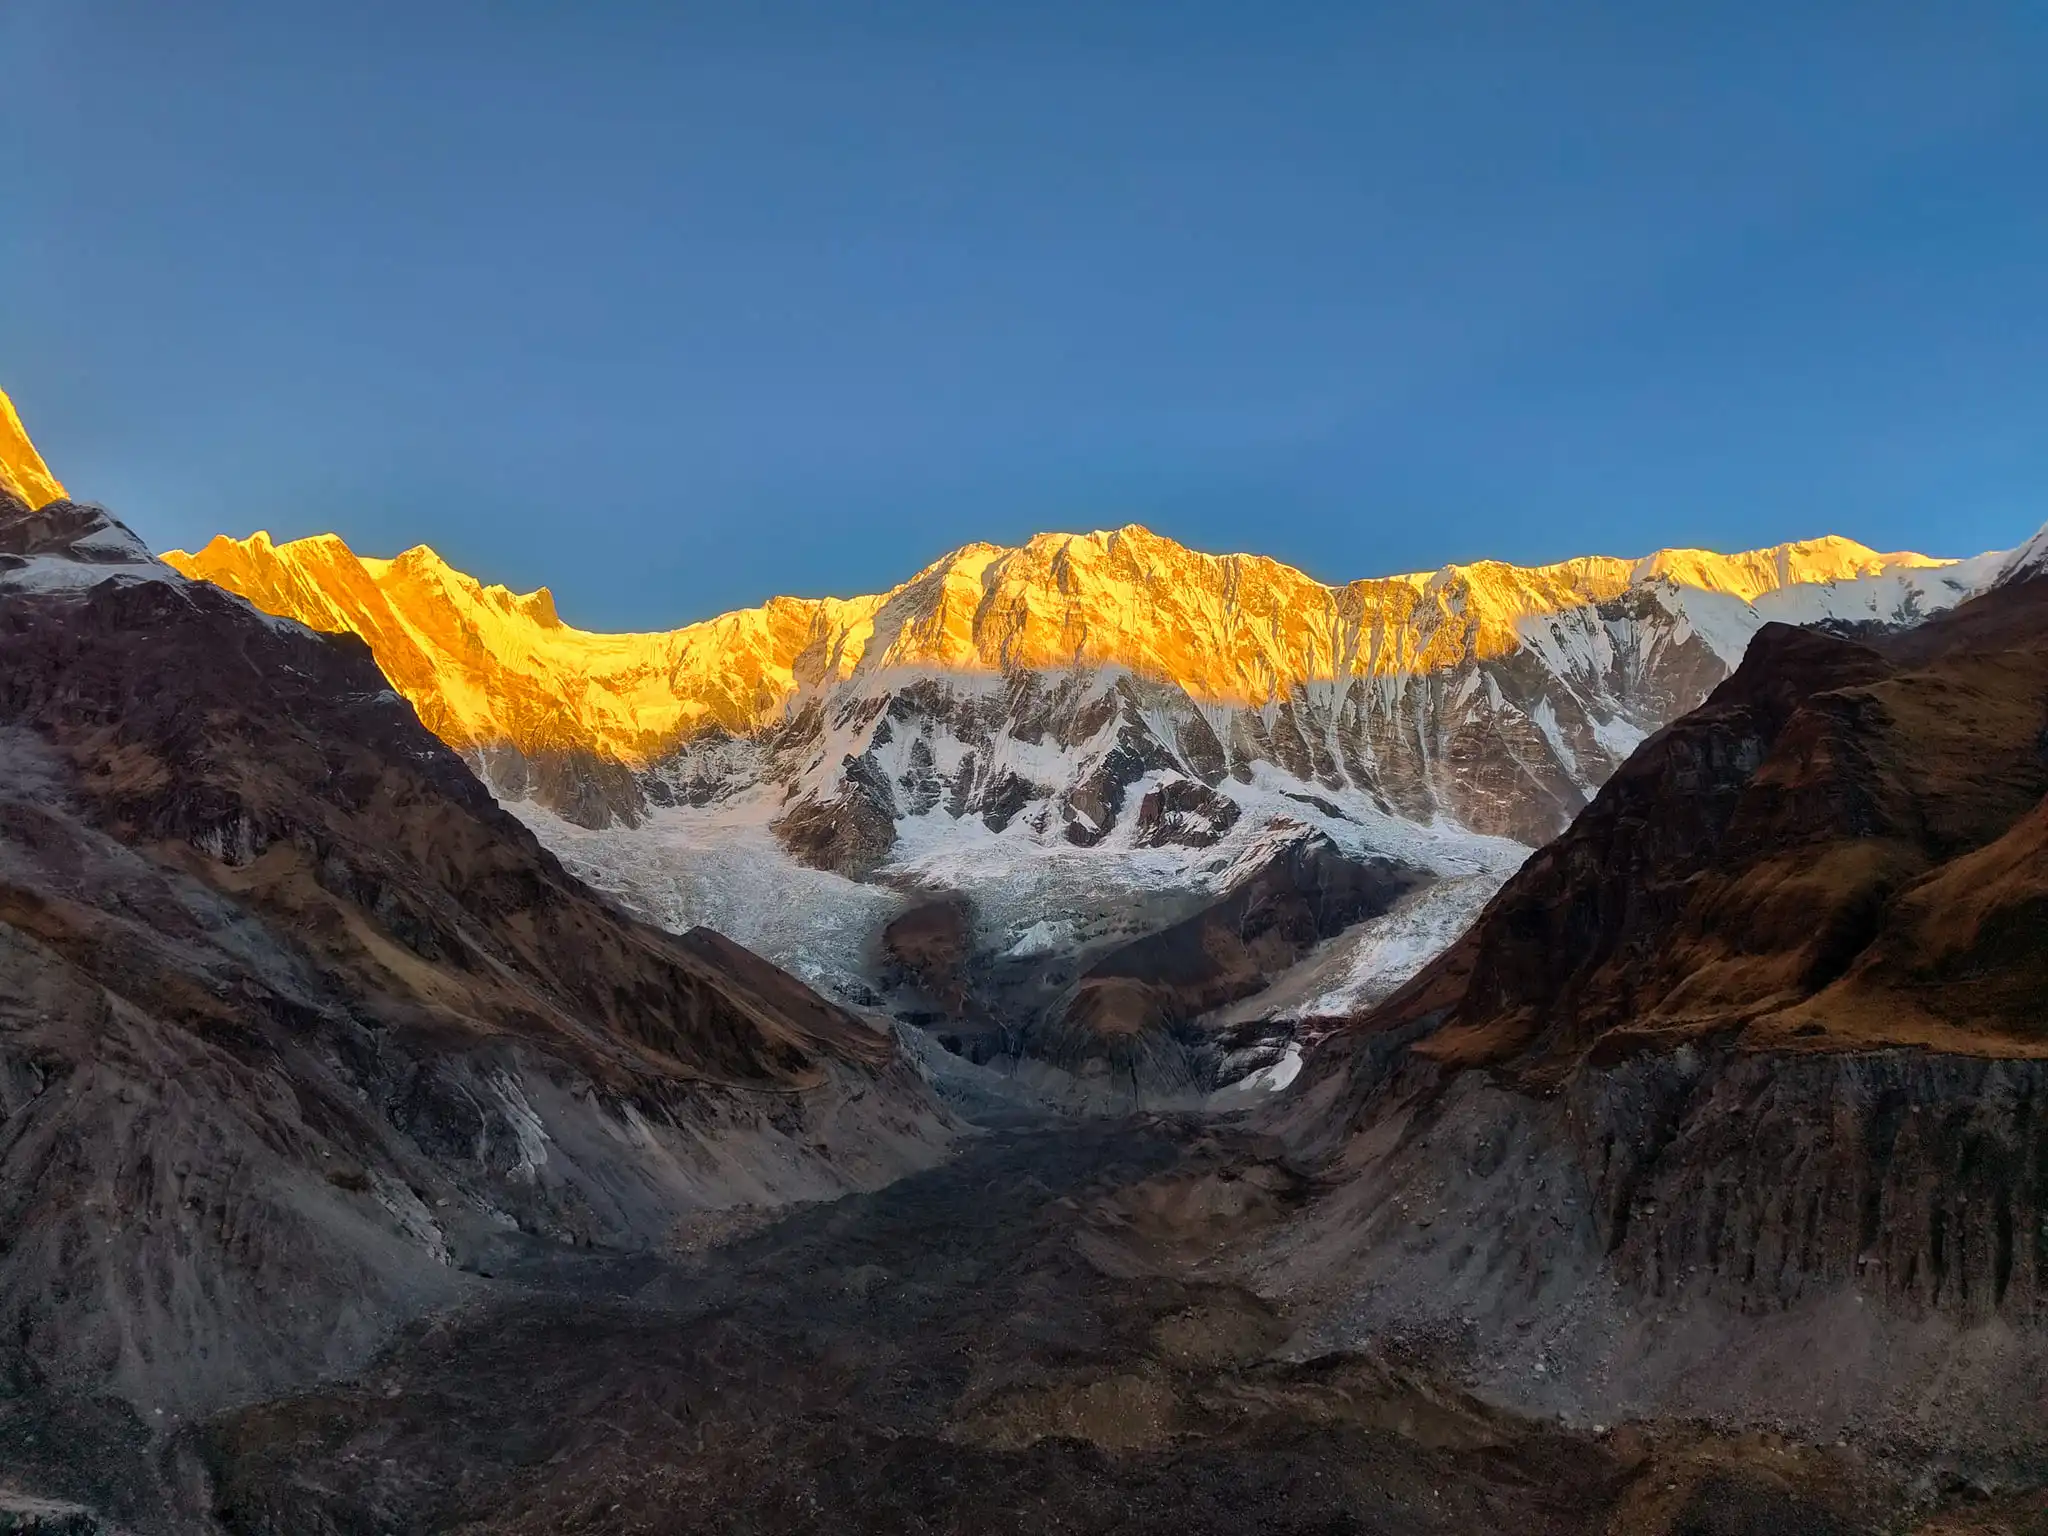
High in the Himalayas of Nepal, the journey to Gosaikunda Lake is more than just a trek — it’s a test of endurance, altitude, and mindset. Sitting at an altitude of 4,380 meters, this sacred alpine lake attracts both trekkers and pilgrims every year.
But here’s the truth that many guides don’t tell you.
The Gosaikunda trek is not just about walking through beautiful landscapes. It involves steep uphill climbs, changing weather, and thinner air that can make even short distances feel exhausting — especially if you are not prepared.
Most articles online will give you basic information like itinerary and cost. But they often miss what really matters:
- How difficult is the trek in reality?
- Can beginners actually complete it?
- How much money do you really need in Nepali context?
This guide is different.
In this complete Gosaikunda trek guide, you’ll learn everything you need — from route and distance to real difficulty, cost breakdown, and practical tips based on real trekking experience. Whether you are a first-time trekker or planning your next adventure, this article will help you decide if the Gosaikunda trek is right for you.
Gosaikunda Trek Overview (Location, Altitude & Highlights)
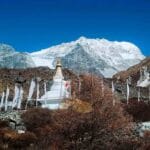
The Gosaikunda trek is located inside the beautiful Langtang National Park, in the Rasuwa district of Nepal. This region is known for its alpine landscapes, traditional Tamang culture, and peaceful mountain trails.
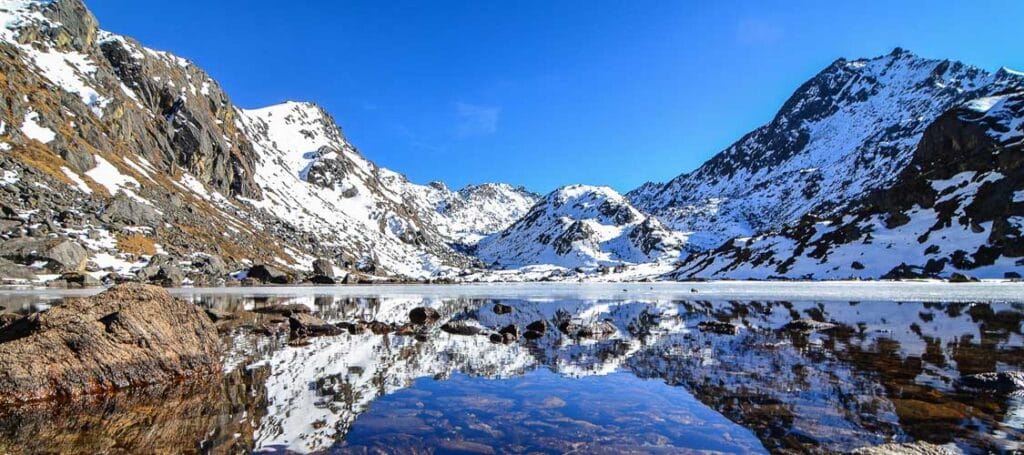
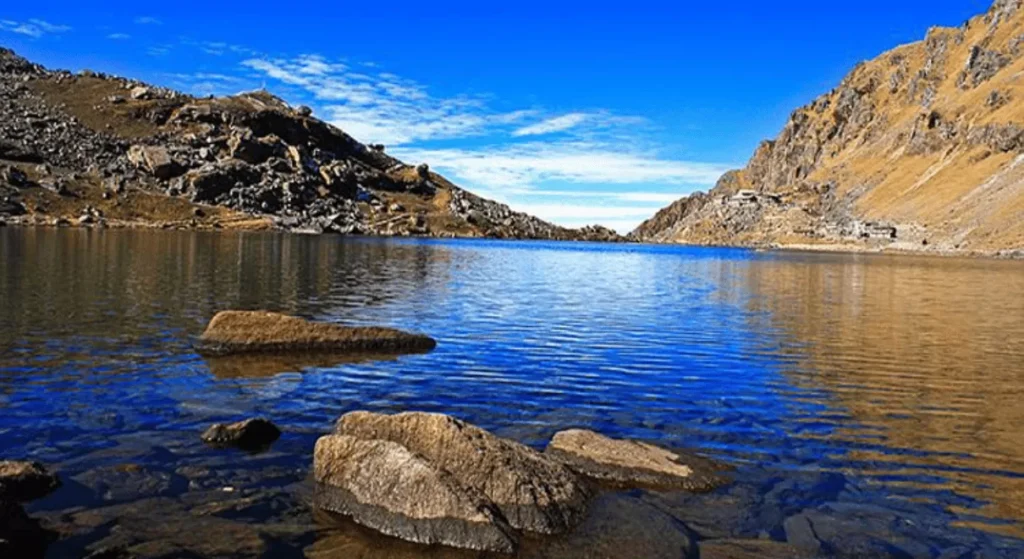
The main destination, Gosaikunda Lake, sits at a high altitude of 4,380 meters (14,370 feet). At this elevation, the air becomes thinner, and trekking becomes more physically demanding than it looks on paper.
Most trekkers start their journey from Dhunche or Syabrubesi, gradually climbing through forests, hills, and open landscapes before reaching the sacred lake.
What makes the Gosaikunda trek special is not just the destination, but the journey itself. Along the way, you’ll experience:
- Dense forests filled with rhododendron and pine
- Stunning mountain views of the Langtang region
- Peaceful trails with fewer crowds compared to Everest or Annapurna
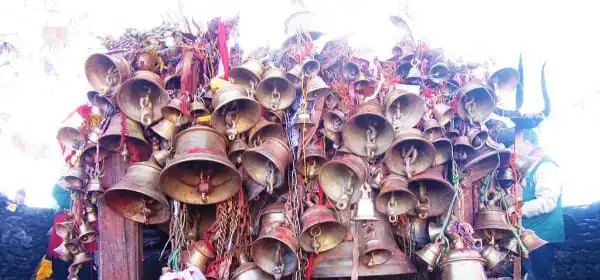
- Spiritual significance, especially during Janai Purnima
But don’t underestimate it.
Even though the distance may seem short, the continuous uphill climb and altitude gain make this trek challenging — especially for beginners.
Gosaikunda Trek Route & Distance (Detailed Guide)
One of the most common questions trekkers have before planning this journey is simple:
“How far is the Gosaikunda trek, and which route should I take?”
The answer is not as straightforward as it seems.
The total distance of the Gosaikunda trek can vary depending on the route you choose. On average, the full trek distance ranges from around 30 km to 70+ km, depending on your starting point and itinerary.
However, if you are taking the most popular and shortest route from Dhunche to Gosaikunda Lake, the one-way distance is roughly 12 to 18 km.
Sounds short, right?
But here’s where most beginners make a mistake.
Distance vs Difficulty (Real Truth)
Even though the distance looks small on paper, the trek is much harder than expected.
Why?
Because you are gaining more than 2,000 meters of altitude in just a couple of days, starting from around 2,000 meters in Dhunche and reaching 4,380 meters at Gosaikunda.
That means:
- Steep uphill climbs
- Continuous elevation gain
- Less oxygen
👉 In reality, this trek feels much longer than the actual distance
Main Route Options (Which One Should You Choose?)
There are two main routes to reach Gosaikunda:
🔵 1. Dhunche Route (Most Popular & Shortest)
This is the best option for:
- Beginners
- Short-time trekkers
- Nepali trekkers
Route:
Dhunche → Deurali → Chandanbari (Sing Gompa) → Laurebina → Gosaikunda
👉 Key facts:
- Duration: 2–3 days to reach lake
- Distance: ~12–18 km one way
- Walking: 5–7 hours daily
This route is direct but involves steep uphill from the first day, which can be physically demanding.
👉 Real experience:
The climb after Dhunche starts gradually but quickly turns into a long uphill stretch that tests your stamina.
🟢 2. Sundarijal / Helambu Route (Longer & Scenic)
This route is better for:
- Experienced trekkers
- Those who want longer adventure
Route:
Sundarijal → Chisapani → Kutumsang → Tharepati → Gosaikunda
👉 Key facts:
- Duration: 5–7+ days
- Longer distance but gradual ascent
- Better acclimatization
This route gives you:
- More scenic diversity
- Less sudden altitude gain
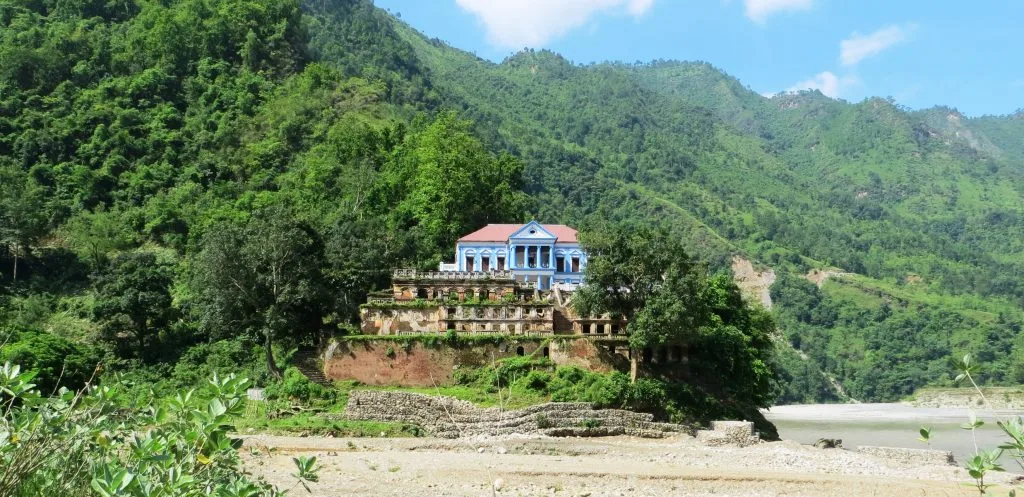
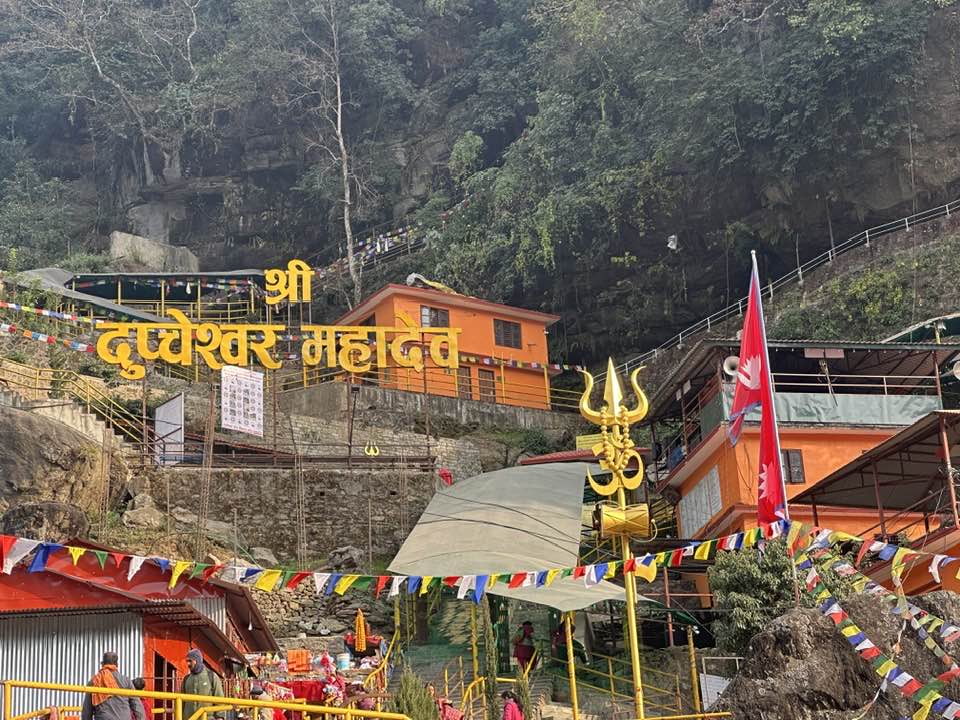
But it requires more time and planning. There’s also an alternate route to Gosaikunda via the sacred Dupcheshwor Mahadev Temple — a culturally rich side trek worth exploring.
Which Route is Better?
👉 Simple answer:
- Short time? → Choose Dhunche route
- Better experience + less risk? → Choose Helambu route
Most trekkers (especially Nepali) prefer the Dhunche route because it is faster and more accessible. you can also go there via Dupcheshwor route.
Typical Walking Pattern (Daily Breakdown)
No matter which route you choose, your daily trekking will look like this:
- ⏱️ 5–7 hours walking per day
- 📈 Continuous uphill (especially first 2 days)
- 🥾 Rocky and forest trails
👉 Important:
Even experienced trekkers feel tired due to altitude, not just distance.
Reality Check (DON’T IGNORE THIS)
Many people think:
👉 “It’s only 15 km, I can finish quickly.”
But in reality:
- Some trekkers take 2–3 days to reach the lake
- Fast trekkers can descend in 1 day, but it takes 9–10 hours of continuous walking
Pro Tip (Very Important)
If you are a beginner:
- Don’t rush
- Take proper rest stops
- Respect altitude
👉 Because this trek is not about distance —
👉 it’s about how your body handles altitude and uphill climbs
Gosaikunda Trek Itinerary (3–5 Days Detailed Plan)
One of the biggest advantages of the Gosaikunda trek is that it can be completed in just a few days. However, the short duration doesn’t mean it’s easy.
In fact, choosing the right itinerary can make the difference between an enjoyable trek and a physically exhausting experience.
Below is a practical and realistic itinerary based on the most popular route starting from Dhunche.
3 Days Gosaikunda Trek Itinerary (Fast-Paced)
👉 Best for:
- फिट trekkers
- Limited time
- Previous trekking experience
🔵 Day 1: Dhunche → Chandanbari (Sing Gompa)
- ⏱️ Walking time: 5–6 hours
- 📈 Altitude gain: ~2,000m → 3,250m
The trek starts from Dhunche with a gradual climb through forests filled with pine and rhododendron. The trail becomes steeper as you go higher.
Chandanbari, also known as Sing Gompa, is a peaceful stop with basic tea houses and even a small cheese factory.
👉 Real feel:
The first day might seem manageable, but the uphill sections can already start testing your stamina.
🟢 Day 2: Chandanbari → Laurebina → Gosaikunda Lake
- ⏱️ Walking time: 6–7 hours
- 📈 Altitude gain: 3,250m → 4,380m
This is the hardest and most rewarding day of the trek.
You will pass through Laurebina, where the tree line starts disappearing, and the landscape becomes more open and alpine. As you gain altitude, the air gets thinner, and walking becomes slower.
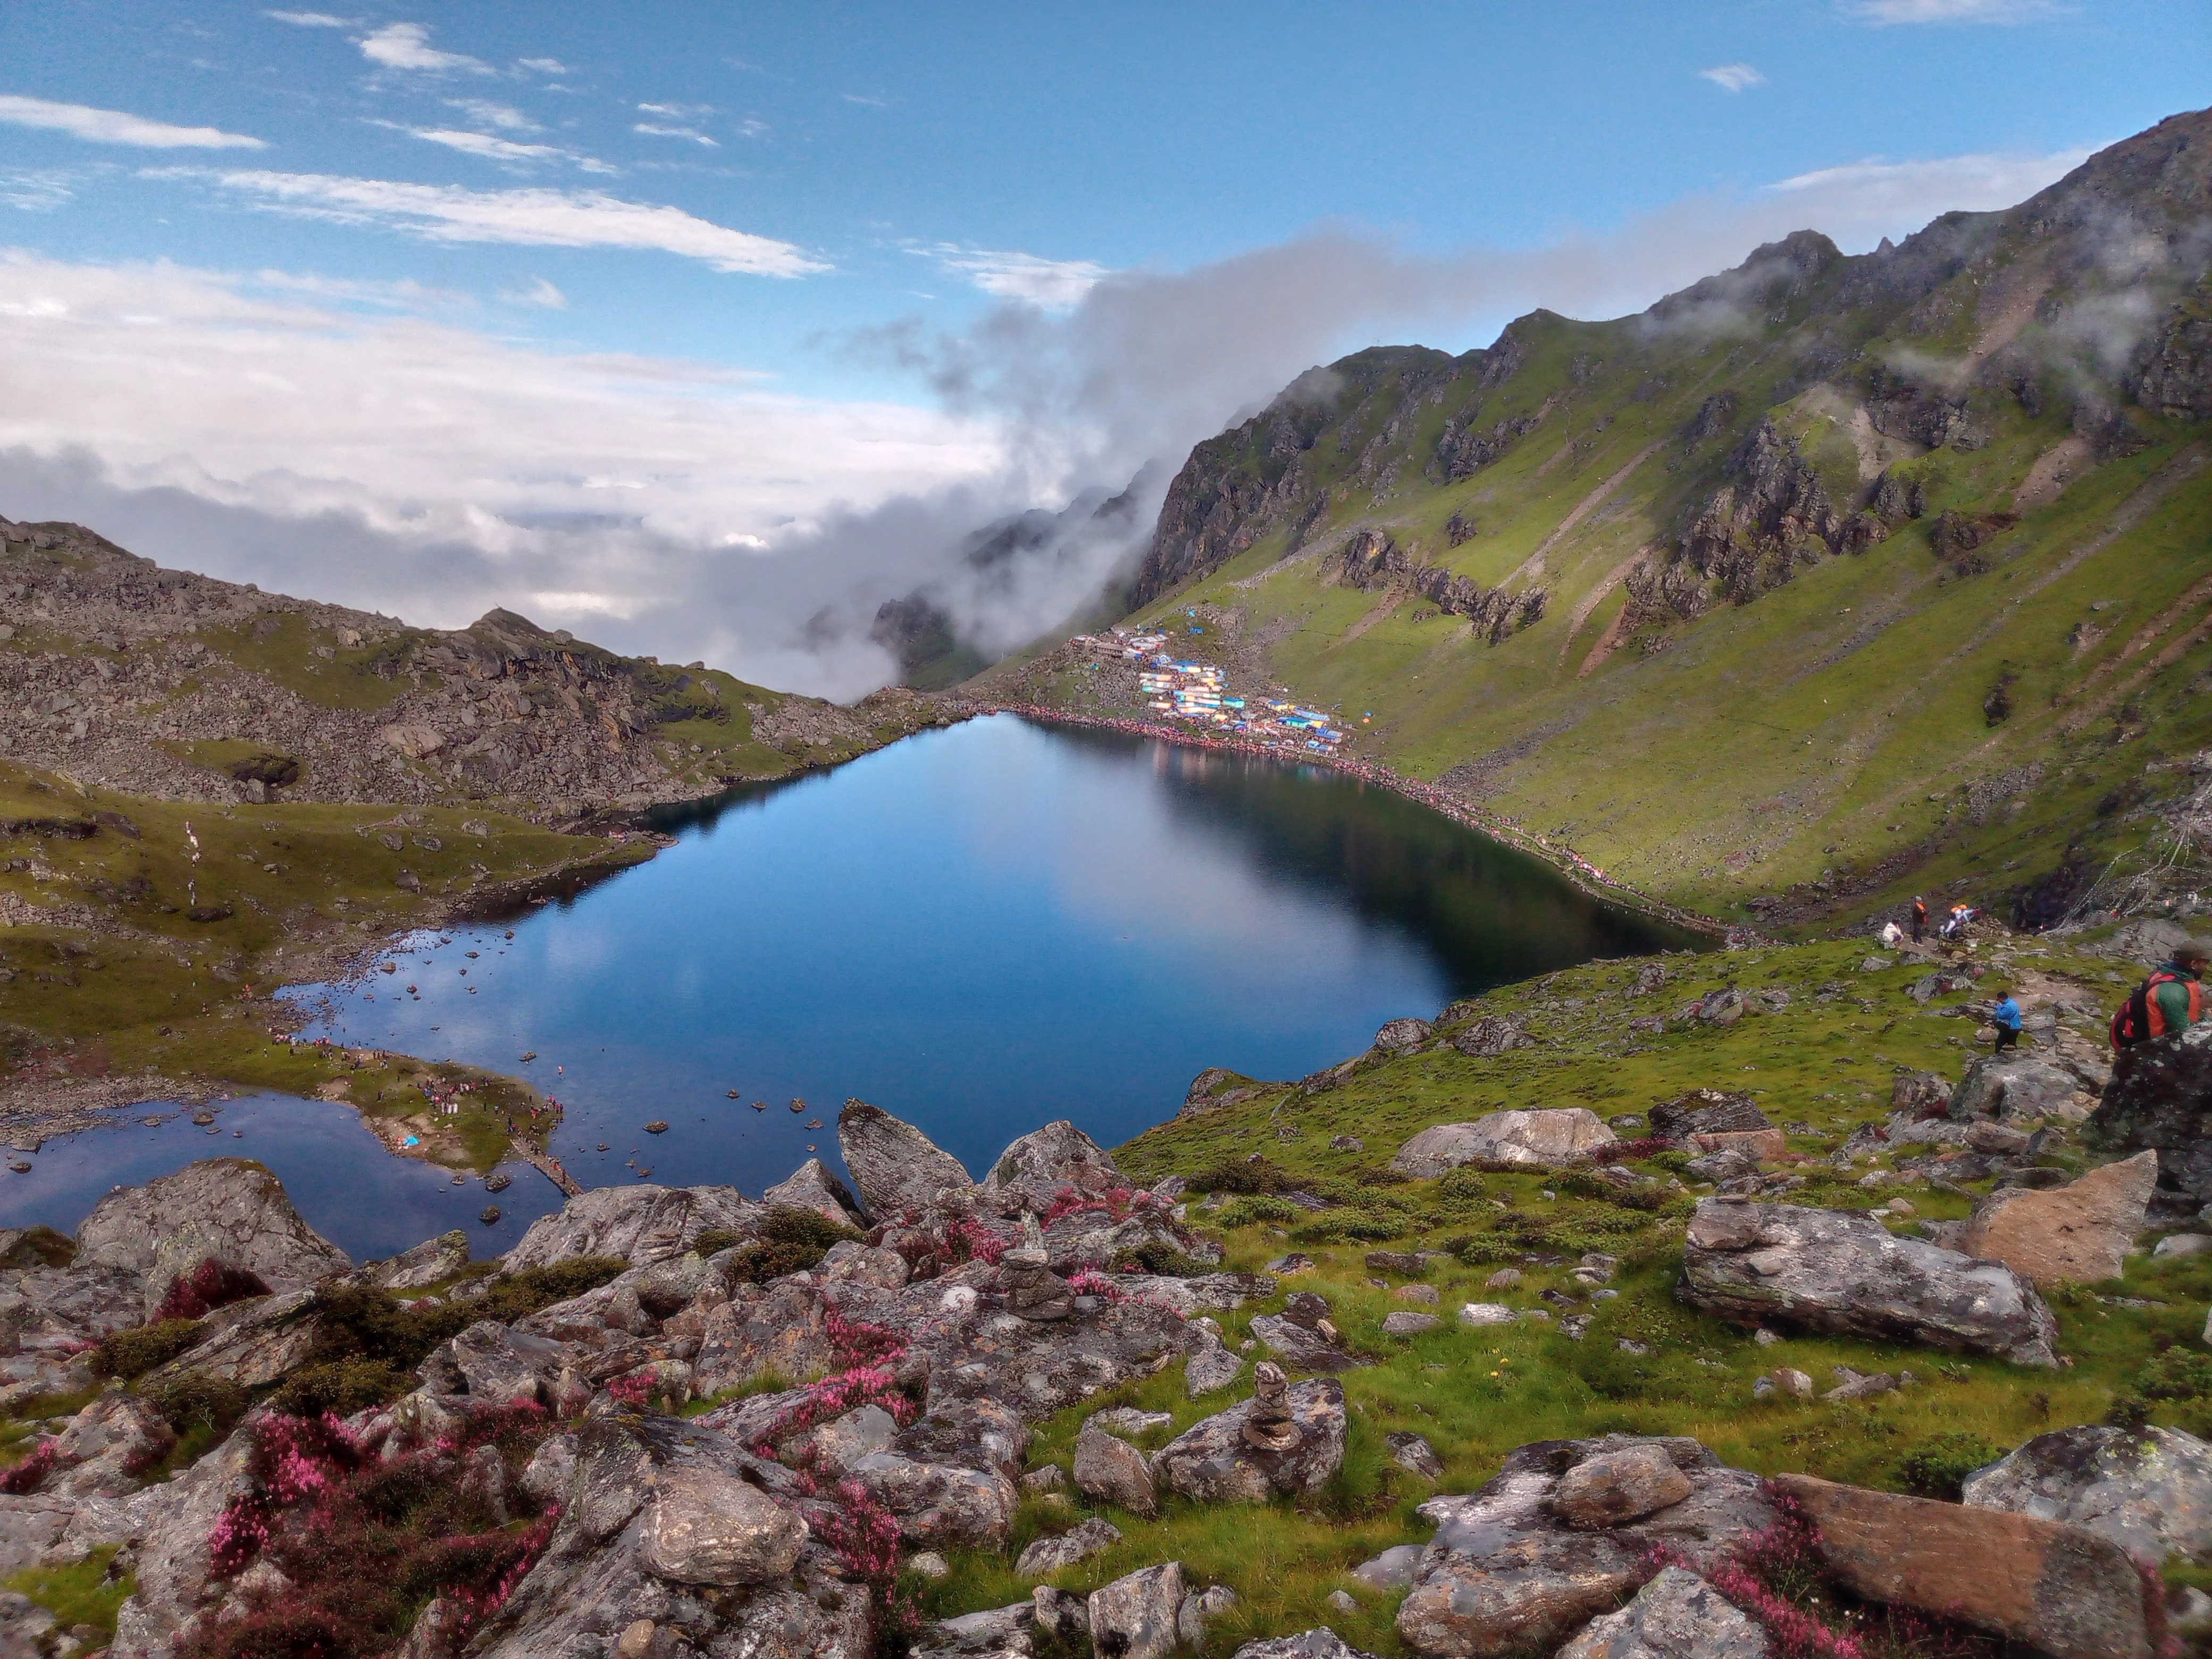
Finally, you reach Gosaikunda Lake — a breathtaking high-altitude lake surrounded by mountains.
👉 Reality:
This day feels long, tiring, and unforgettable at the same time.
🔴 Day 3: Gosaikunda → Dhunche (Return)
- ⏱️ Walking time: 8–10 hours
- 📉 Mostly downhill
Most trekkers return to Dhunche on the same route.
Descending is faster but can be tough on your knees due to long downhill walking.
👉 Tip:
Start early in the morning to avoid exhaustion.
Is 3 Days Itinerary Good?
👉 Honest answer:
- ✔️ Possible
- ❌ Not ideal for beginners
Because:
- No proper acclimatization
- High altitude gain in short time
4–5 Days Gosaikunda Trek Itinerary (Recommended)
👉 Best for:
- Beginners
- आरामले trek गर्न चाहने
- Safe experience
🔵 Day 1: Dhunche → Deurali
- ⏱️ 4–5 hours
- Easier start
- Better acclimatization
🟢 Day 2: Deurali → Chandanbari
- ⏱️ 3–4 hours
- Short walking day
- Energy बचत हुन्छ
🟡 Day 3: Chandanbari → Laurebina
- ⏱️ 4–5 hours
- Gradual altitude gain
🔵 Day 4: Laurebina → Gosaikunda Lake → back to Laurebina
- ⏱️ 5–6 hours
- Explore lake properly
🔴 Day 5: Return to Dhunche
- ⏱️ 6–7 hours
Which Itinerary Should You Choose?
👉 Simple decision:
- 🟢 Beginner → 5 days
- 🟡 Average → 4 days
- 🔴 Experienced → 3 days
Pro Tips for Itinerary Planning
- Don’t rush altitude gain
- Stay hydrated
- Take proper rest
- Listen to your body
👉 Because in high altitude trekking, speed doesn’t matter—safety does
Gosaikunda Trek Difficulty (Is It Hard for Beginners?)
Let’s be honest.
The Gosaikunda trek is often described as a “moderate trek” online. But that description doesn’t fully explain the real challenge — especially for beginners.
In reality, the Gosaikunda trek is moderate to difficult, depending on your fitness level, experience, and how well your body handles altitude.
What Makes This Trek Difficult?
1. 📈 Steep and Continuous Uphill
Unlike some treks where you get gradual ascents, this trek involves long uphill climbs from the very beginning, especially from Dhunche.
👉 Reality:
- You’ll be walking uphill for hours
- Very few flat sections
- Legs get tired quickly
Many trekkers underestimate this part and struggle on the first two days.
2. ⛰️ High Altitude (Biggest Challenge)
Reaching Gosaikunda Lake means climbing up to 4,380 meters.
At this height:
- Oxygen levels drop
- Breathing becomes harder
- Energy drains faster
👉 Even simple walking can feel exhausting.
There’s also a risk of Altitude Sickness if you go too fast without proper rest.
3. 🥾 Long Walking Hours
On average, you’ll walk:
- 5–7 hours per day
- Up to 8–10 hours on return day
👉 For beginners, this can feel overwhelming.
4. Weather Conditions
Weather in the mountains can change quickly:
- Cold mornings and nights
- Sudden fog
- Wind at higher altitude
👉 This adds extra difficulty, especially near the lake.
⚖️ Difficulty Level (Simple Rating)
👉 Based on experience:
- 🟢 Easy → ❌ Not easy
- 🟡 Moderate → ✔️ Partially true
- 🔴 Difficult → ✔️ For beginners
👉 Final answer:
Moderate for experienced trekkers, difficult for beginners
Can Beginners Do Gosaikunda Trek?
👉 Honest answer: YES — but with preparation
You can complete this trek if:
- You have basic fitness
- You take enough days (4–5 days recommended)
- You don’t rush
👉 Many first-time trekkers successfully complete it every year.
But…
👉 If you:
- Have no walking habit
- Try to finish in 2–3 days
- Ignore altitude
Then it can become very difficult.
Real Tips to Handle Difficulty
- Walk slowly (don’t rush)
- Take short breaks
- Drink plenty of water
- Eat properly
- Start early each day
👉 Most important:
Listen to your body — not your ego
Common Mistakes (Avoid These)
- ❌ Starting too fast
- ❌ Ignoring altitude symptoms
- ❌ Overconfidence (“easy trek ho”)
- ❌ Poor packing
👉 These mistakes make the trek feel much harder than it actually is.
Final Verdict
The Gosaikunda trek is not the easiest trek in Nepal — but it’s definitely achievable.
👉 If you prepare well, take your time, and respect the altitude,
this trek can become one of the most rewarding experiences of your life.
Altitude & Acclimatization in Gosaikunda Trek (How to Stay Safe)
One of the most important things to understand before doing the Gosaikunda trek is altitude.
As you climb higher toward Gosaikunda Lake (4,380 meters), the oxygen level in the air decreases. This means your body has to work harder even for simple activities like walking or climbing stairs.
And this is where many trekkers face problems.
What Happens at High Altitude?
At higher elevations:
- Oxygen levels drop
- Breathing becomes difficult
- Energy levels decrease
👉 You may feel:
- Headache
- Dizziness
- Loss of appetite
- Difficulty sleeping
These are early signs of Altitude Sickness.
Why Gosaikunda Trek Is Risky (If You Rush)
The biggest challenge of this trek is rapid altitude gain.
Most trekkers start from around 2,000 meters (like Dhunche) and reach 4,380 meters within 2–3 days.
👉 That’s a big jump in a short time.
If your body doesn’t get enough time to adjust, the risk of altitude sickness increases.
🟢 How to Acclimatize Properly
Acclimatization simply means giving your body time to adjust to higher altitude.
Here’s how you can do it safely:
✔️ 1. Go Slow
- Don’t rush your trek
- Follow a 4–5 day itinerary instead of 3 days
✔️ 2. Stay Hydrated
- Drink 3–4 liters of water daily
- Avoid alcohol and smoking
✔️ 3. Take Rest Breaks
- Don’t push yourself too hard
- Take short breaks during climbs
✔️ 4. Sleep at Lower Altitude (If Possible)
- Example: visit Gosaikunda and return to lower point like Laurebina
✔️ 5. Eat Proper Food
- Don’t skip meals
- Your body needs energy
When to STOP (Important)
👉 You should stop or descend if you feel:
- Severe headache
- Vomiting
- Extreme weakness
- Difficulty breathing
👉 Never ignore these signs.
Descending to a lower altitude is the fastest and safest solution.
Pro Tip (Very Important)
Many trekkers think:
👉 “I’m strong, I can handle it”
But altitude doesn’t depend on strength.
👉 Even fit people can get sick.
Final Advice
Altitude is the only real danger in the Gosaikunda trek — but it is completely manageable if you are careful.
Take your time, listen to your body, and don’t rush the journey.
👉 Because reaching Gosaikunda Lake safely is far more important than reaching it quickly.
Best Time to Visit Gosaikunda Trek (Season Guide)
Choosing the right time to do the Gosaikunda trek can completely change your experience.
The same trail can feel easy and enjoyable in one season — and extremely difficult in another.
So, when is the best time to visit Gosaikunda Lake?
Let’s break it down season by season.
Spring (March to May) – Best Overall Time
Spring is considered one of the best seasons for the Gosaikunda trek.
✔️ What to expect:
- Clear skies and stable weather
- Blooming rhododendron forests
- Comfortable temperatures
👉 Why it’s great:
- Perfect balance of weather and visibility
- Trails are lively but not overcrowded
👉 Best for:
- Beginners
- First-time trekkers
Autumn (September to November) – Most Popular Season
Autumn is another excellent time and the most popular trekking season in Nepal.
✔️ What to expect:
- Crystal clear mountain views
- Dry trails
- Stable weather
👉 Why people love it:
- Best visibility of mountains
- Ideal trekking conditions
👉 Downside:
- Slightly more crowded
Winter (December to February) – Challenging but Beautiful
Winter trekking is possible, but it comes with extra challenges.
✔️ What to expect:
- Cold temperatures (especially at night)
- Snow-covered trails
- Fewer trekkers
👉 Reality:
At higher altitudes near Gosaikunda Lake, temperatures can drop below freezing, and the lake may even be partially frozen.
👉 Best for:
- Experienced trekkers
- Those who enjoy snow
👉 Not ideal for beginners.
Monsoon (June to August) – Not Recommended
Monsoon is generally the least preferred season.
❌ Challenges:
- Heavy rainfall
- Slippery trails
- Leeches in forest areas
- Limited mountain views
👉 Reality:
The trail becomes muddy and uncomfortable, especially in lower regions.
Special Time: Janai Purnima Festival
During the Hindu festival of Janai Purnima, thousands of pilgrims visit Gosaikunda.
👉 What happens:
- Religious significance increases
- Trails become crowded
- Unique cultural experience
👉 If you want:
- Spiritual vibe → Go during festival
- Peaceful trek → Avoid this time
Final Verdict (Simple Answer)
👉 Best time:
- 🌸 Spring (March–May)
- 🍁 Autumn (Sept–Nov)
👉 Avoid:
- 🌧️ Monsoon (unless experienced)
👉 Optional:
- ❄️ Winter (only if prepared)
Pro Tip
If you want the best experience:
👉 Choose a time when:
- Weather is stable
- Visibility is clear
- Your fitness is ready
Because even the best season won’t help if you are not prepared.
Gosaikunda Trek Cost (Complete Budget Breakdown in NPR & USD)
One of the biggest questions before planning this trek is simple:
👉 “How much does the Gosaikunda trek actually cost?”
The answer depends on how you travel — budget, mid-range, or guided.
But let’s break it down in a realistic Nepali + USD context so you can plan properly.
Total Cost Overview (Quick Answer)
🇳🇵 Nepali Trekkers:
- Budget: NPR 7,000 – 15,000
- Comfortable: NPR 15,000 – 30,000+
🌍 Foreign Trekkers:
- Budget: $400 – $500
- Guided: $500 – $750+
Detailed Cost Breakdown
🚗 1. Transportation (Kathmandu → Dhunche)
🇳🇵 Nepali:
- Bus: NPR 600 – 800
- Jeep: NPR 1,200 – 1,800
🌍 Foreign:
- Bus: $6 – $8
- Shared jeep: $10 – $20
👉 Reality:
- Cheap but long (7–9 hours travel)
2. Permits
🇳🇵 Nepali:
- Langtang entry: ~NPR 100
🌍 Foreign:
- National Park Permit: NPR 3,000 (~$23)
- TIMS Card: NPR 1,000–2,000 ($8–15)
3. Accommodation (Tea Houses)
- Lower altitude: NPR 400 – 800
- Higher altitude: NPR 1,000 – 1,500
👉 USD:
- $3 – $15 per night
👉 Reality:
- Higher = more expensive (transport cost)
4. Food Cost (Biggest Expense)
🇳🇵 Nepali:
- NPR 1,200 – 2,500 per day
👉 Example:
- Dal Bhat:
- Dhunche: NPR 300
- Gosaikunda Lake: NPR 600–700
🌍 Foreign:
- $15 – $25 per day
👉 Reality:
Food price increases with altitude.
5. Guide & Porter (Optional)
- Guide: $20 – $30/day
- Porter: $15 – $20/day
👉 Nepali:
- NPR 1,500 – 2,500/day
👉 Tip:
- Not compulsory, but helpful for beginners
⚡ 6. Extra Costs (Hidden)
Don’t ignore these:
- Hot shower: NPR 300 – 600
- Charging: NPR 100 – 300/hour
- WiFi: NPR 200 – 400
👉 These small costs add up quickly
Daily Budget Estimate
🇳🇵 Nepali:
👉 NPR 2,000 – 3,500 per day
🌍 Foreign:
👉 $20 – $60 per day
Budget Types (Simple Comparison)
🟢 Budget Trek (DIY)
- Nepali: NPR 7k – 15k
- Foreign: $400 – $500
👉 Best for:
- Students
- Solo trekkers
🟡 Mid-Range Trek
- Nepali: NPR 20k – 30k
- Foreign: $500 – $700
👉 Includes:
- Better food
- Comfortable stay
🔴 Guided Package
- $700 – $900+
👉 Includes:
- Guide
- Food
- Transport
- Accommodation
Real Truth (IMPORTANT)
Many articles say:
👉 “Trek is cheap”
But reality:
- Food gets expensive at altitude
- Hidden costs increase
- Budget depends on your habits
Money-Saving Tips (Game Changer)
- Eat Dal Bhat (unlimited, cheaper)
- Avoid unnecessary snacks
- Carry power bank (save charging cost)
- Travel in group (share jeep cost)
Final Verdict
The Gosaikunda trek is one of the most affordable treks in Nepal — but only if you plan smartly.
👉 For Nepali trekkers, it can be done under NPR 10,000
👉 For foreigners, expect at least $400+
Accommodation & Food on Gosaikunda Trek (Real Tea House Experience)
One thing you don’t need to worry about during the Gosaikunda trek is accommodation.
Unlike remote camping treks, this route has basic tea houses (lodges) along the trail, where you can sleep, eat, and rest after a long day of walking.
But don’t expect luxury.
👉 The higher you go toward Gosaikunda Lake, the more basic everything becomes.
Accommodation (Tea Houses)
🏡 What to Expect
Most tea houses offer:
- Simple twin-sharing rooms
- Basic beds with blankets
- Shared toilets
👉 Lower areas like Dhunche and Chandanbari:
- Better rooms
- More facilities
👉 Higher areas (Laurebina, Gosaikunda):
- Very basic rooms
- Limited space
- Colder environment
Reality of Staying at High Altitude
At higher altitudes:
- Rooms are not heated
- Nights are very cold
- Blankets may not be enough
👉 Real tip:
Carry a sleeping bag if you feel cold easily.
Facilities (What’s Available?)
✔️ Available:
- Bed
- Food
- Limited electricity
❌ Limited:
- WiFi (slow or paid)
- Charging (paid)
- Hot showers (extra cost)
👉 Everything becomes more expensive as you go higher.
Food on the Trek
Food is simple but filling.
🥘 Common Meals:
- Dal Bhat (most popular)
- Noodles
- Fried rice
- Tibetan bread
- Eggs, soup, tea
Why Dal Bhat Is the Best Choice
👉 “Dal Bhat power, 24 hour” 😄
- Unlimited refill
- Nutritious
- Best energy source for trekking
👉 That’s why most trekkers eat Dal Bhat daily.
Food Price Reality
As you climb higher:
- Food prices increase
- Menu options decrease
👉 Example:
- Lower area: cheap meals
- Near Gosaikunda Lake: almost double price
👉 Reason:
All food items are carried by porters or animals.
Drinking Water
You have 3 options:
- Buy bottled water (expensive at altitude)
- Boiled water (cheaper)
- Carry purification tablets (best option)
👉 Tip:
Avoid untreated water to stay safe.
⚠️ Real Experience (What People Don’t Tell You)
- Rooms can get crowded in peak season
- Dining area is warm, rooms are cold
- Food may take time (busy hours)
👉 But this is part of the trekking experience.
💡 Pro Tips (Very Important)
- Sleep early (no nightlife 😄)
- Carry snacks for energy
- Bring power bank
- Don’t expect hotel-level comfort
👉 Adjust mindset = better experience
Final Verdict
Accommodation and food on the Gosaikunda trek are simple but sufficient.
👉 You won’t get luxury —
👉 but you will get everything you need to complete the trek comfortably.
And honestly, after a long day of walking, even a simple meal and bed feel amazing.
How to Reach Gosaikunda Trek from Kathmandu (Transport Guide)
Before you even start trekking, you need to reach the starting point.
For the Gosaikunda trek, most trekkers begin their journey from either Dhunche or Syabrubesi — both located in Rasuwa district.
The journey from Kathmandu is an adventure in itself.
Kathmandu to Dhunche Distance & Time
- 📍 Distance: حوالي 100–120 km
- ⏱️ Travel time: 7–9 hours
👉 Even though the distance is short, the road is hilly and rough in some sections, which makes the journey longer.
Option 1: Local Bus (Budget Choice)
💰 Cost:
- NPR 600 – 800
📍 Departure:
- Machhapokhari (Kathmandu)
✔️ Pros:
- Cheapest option
- Easily available
❌ Cons:
- Crowded
- Less comfortable
- Slow
👉 Best for:
- Budget trekkers
- Nepali travelers
Option 2: Shared Jeep (Best Balance)
💰 Cost:
- NPR 1,200 – 1,800
✔️ Pros:
- Faster than bus
- More comfortable
❌ Cons:
- Slightly expensive
👉 Best for:
- Small groups
- Those who want comfort + speed
Option 3: Private Jeep (Comfortable Option)
💰 Cost:
- NPR 10,000 – 15,000 (full vehicle)
✔️ Pros:
- Flexible timing
- Comfortable
- Faster
👉 Best for:
- Groups
- Family यात्रु
Road Condition (Real Truth)
Let’s be honest.
- Some parts of the road are smooth
- Some sections are rough and dusty
- During monsoon → muddy and difficult
👉 So don’t expect a luxury ride.
Dhunche vs Syabrubesi (Where to Start?)
🟢 Dhunche:
- Direct route to Gosaikunda
- Shorter trek
- Most popular starting point
🔵 Syabrubesi:
- Slightly longer route
- Option to combine with Langtang Valley trek
👉 Simple answer:
- Short trek → Dhunche
- Longer adventure → Syabrubesi
Best Time to Travel
- Start early morning from Kathmandu
- Avoid late departure (road conditions + delays)
👉 Tip:
Try to reach Dhunche before evening.
Pro Tips (Important)
- Book jeep early in peak season
- Carry snacks and water for the journey
- Sit on left/right side for better views 😄
Final Verdict
Reaching the starting point of the Gosaikunda trek is not difficult, but it requires patience.
👉 The road may be long and bumpy, but once you reach Dhunche, the real adventure begins.
What to Pack for Gosaikunda Trek (Simple & Smart Packing Guide)
Let’s be real.
Packing for the Gosaikunda trek is where many beginners go wrong.
Some people carry too much and suffer because of heavy bags.
Others carry too little and regret it in the cold near Gosaikunda Lake.
So the goal is simple:
👉 Pack light — but pack smart
The Golden Rule
If your bag feels heavy before the trek starts…
👉 it will feel twice as heavy on the uphill.
Clothing (Layering Is Key)
Weather changes fast in the mountains, so layering is important.
✔️ Must-have:
- Warm jacket (down jacket if possible)
- Fleece or hoodie
- 2–3 t-shirts (quick dry)
- Trekking pants
- Thermal innerwear (for cold nights)
👉 Real tip:
Mornings can feel warm, but evenings near the lake get very cold.
Footwear (DON’T IGNORE THIS)
- Good trekking shoes (grip must be strong)
- Extra socks (at least 2–3 pairs)
👉 Reality:
Bad shoes = blisters = pain = ruined trek
Cold Protection
As you go higher:
- Wind increases
- Temperature drops
So carry:
- Gloves
- Woolen cap
- Neck buff or scarf
Essentials (Small but Important)
- Water bottle (or hydration bag)
- Sunglasses (sun is strong at altitude)
- Sunscreen
- Lip balm
Power & Gadgets
- Power bank (very important)
- Phone
- Torch or headlamp
👉 Because:
Charging costs money and is not always available.
Snacks (Energy Boost)
- Chocolates
- Dry fruits
- Energy bars
👉 These help when you feel low energy during uphill climbs.
Basic Medicines
- Paracetamol
- Medicine for Altitude Sickness (if needed)
- Band-aids
👉 Tip:
Don’t depend only on tea houses for medical help.
Water Safety
- Water purification tablets OR
- Filter bottle
👉 Better than buying expensive bottled water.
Optional but Useful
- Sleeping bag (for cold रात)
- Trekking pole (helps on uphill + downhill)
What NOT to Carry
- ❌ Too many clothes
- ❌ Heavy unnecessary items
- ❌ Fancy gear you won’t use
👉 Remember:
You are trekking, not shifting house 😄
Real Packing Advice
If you are confused, just remember this:
👉 “Carry what you need, not what you might need”
Final Verdict
Packing smart can make your trek easy, comfortable, and enjoyable.
Overpacking will slow you down.
Underpacking will make you suffer.
👉 Balance is everything.
Gosaikunda Trek Tips & Mistakes to Avoid (Real Advice You Shouldn’t Ignore)
Most trekking problems don’t happen because the trek is too hard —
they happen because people make small mistakes.
And on a high-altitude trek like Gosaikunda Lake, small mistakes can turn into big problems very quickly.
So here are some real, practical tips that can make your trek much easier.
Common Mistakes (Avoid These at All Costs)
1. 🚫 Starting Too Fast
Many beginners feel excited and walk fast on the first day.
👉 Reality:
- You’ll get tired जल्दी
- Energy finish हुन्छ
👉 Better:
Start slow. Keep a steady pace.
2. 🚫 Ignoring Altitude
This is the biggest mistake.
People think:
👉 “I’m fit, nothing will happen”
But Altitude Sickness doesn’t care about fitness.
👉 If symptoms start:
- Don’t ignore
- Don’t push
- Rest or descend
3. 🚫 Packing Too Heavy
Overpacking is very common.
👉 Reality:
- Heavy bag = slow walking
- More fatigue
👉 Keep it simple.
4. 🚫 Not Drinking Enough Water
At altitude, dehydration happens faster.
👉 Problem:
- Headache
- Weakness
👉 Solution:
Drink water regularly, even if you’re not thirsty.
5. 🚫 Wrong Itinerary Choice
Trying to finish the trek in 2–3 days without preparation.
👉 Result:
- Exhaustion
- High risk
👉 Better:
Take 4–5 days if you are a beginner.
Smart Tips (Make Your Trek Easier)
✔️ 1. Walk Slow, But Consistent
👉 Don’t compete with others
👉 Trek at your own pace
✔️ 2. Start Early Every Day
- Fresh energy
- Better weather
- Less stress
✔️ 3. Eat Properly
Even if you don’t feel hungry:
👉 Eat.
Your body needs fuel.
✔️ 4. Take Breaks (But Not Too Long)
- Short breaks = good
- Long breaks = body gets cold
✔️ 5. Respect the Mountain
👉 Weather changes
👉 Conditions change
So stay flexible and careful.
Real Experience Truth
- The second day feels the hardest
- Altitude hits when you least expect it
- Mental strength matters as much as physical
Simple Mindset Rule
👉 Don’t try to “finish fast”
👉 Try to “finish safely”
Final Advice
The Gosaikunda trek is not just a physical journey — it’s also mental.
If you stay patient, prepared, and aware,
you’ll enjoy every step of the journey.
But if you rush, ignore signs, or overestimate yourself —
the trek will feel much harder than it should.
Gosaikunda Trek Permit Cost 2026 — Complete permit fee breakdown and tips.
Gosaikunda Trek FAQs (Everything You Still Want to Know)
Where is Gosaikunda located?
Gosaikunda Lake is located in Langtang National Park, Rasuwa district of Nepal at an altitude of 4,380 meters.
How difficult is the Gosaikunda trek?
The Gosaikunda trek is considered moderate.
👉 Beginners can do it, but:
Steep uphill
High altitude
make it physically challenging.
How many days does the Gosaikunda trek take?
Standard itinerary: 4–5 days
Fast trek: 3 days (not recommended for beginners)
Do I need a guide for Gosaikunda trek?
Not mandatory, but helpful.
👉 If you are:
Solo traveler
Beginner
then a guide is recommended.
What is the best time for Gosaikunda trek?
Best seasons:
Spring (March–May)
Autumn (September–November)
👉 Clear views + stable weather
Can I do Gosaikunda trek without experience?
Yes, but you need:
Basic fitness
Proper planning
👉 And don’t rush.
Is there internet or network on the trek?
Network available in some places
Internet is limited and slow
👉 Don’t expect full connectivity.
How much does the Gosaikunda trek cost?
Average cost:
NPR 8,000 – 15,000 (budget trek)
$70 – $120 (approx)
Depends on:
Transport
Food
Stay
What is special about Gosaikunda?
Gosaikunda is not just a lake — it’s a sacred place.
👉 It is strongly connected to Lord Shiva and thousands of pilgrims visit during Janai Purnima.
Related Posts

Recent Posts
-

Pokhara Travel Guide 2026: Best Places, Activities & Costs
Apr 30, 2026 | Umesh Thapa
-
Gosaikunda Trek Permit Cost 2026: Complete Fee Breakdown
Apr 28, 2026 | Umesh Thapa
-
Langtang Valley Trek Difficulty: Complete Guide with Tips (2026)
Apr 28, 2026 | Umesh Thapa
-
Langtang Valley Trek Itinerary: 5-Day, 7-Day & 10-Day Options (2026)
Apr 28, 2026 | Umesh Thapa
-
Langtang Valley Trek Cost 2026: Complete Budget Breakdown
Apr 28, 2026 | Umesh Thapa
Popular Posts
-
-
Discover Manungkot: A Hidden Gem in Nepal
Sep 06, 2025 | Umesh Thapa 740 views -
Pathivara Mata Temple Travel Guide 2026 (Trek Distance, Cost & Route)
Oct 29, 2025 | Umesh Thapa 472 views -
Annapurna Base Camp Trek 2026: Complete Guide
Nov 02, 2025 | Umesh Thapa 470 views -
Ghyangswara Park: The Ultimate Peaceful Nature Destination in Nepal
Oct 15, 2025 | Umesh Thapa 423 views